Pre-Installation Instructions

Congratulations on your decision to purchase Permission Assist! Before installing, complete the following checklist to ensure your installation goes as smoothly as possible.


Step 1 - Review the Hardware and Software Requirements

Review the Hardware and Software Requirements to make sure your server(s) are set up and ready to go.


Step 2 - Complete the Checklist

Use the following checklist to make sure all important tasks are complete before installing Permission Assist:

Web Application Server

The web application server uses Windows Server 2022 or newer.

Internet Information Services (IIS) is installed with the proper settings using the following instructions:

  1. On the Permission Assist application server, open Server Manager.

  2. Select Manage in the upper right corner and select Add Roles & Features.

  3. Select Next until you reach Server Roles.

  4. Select Web Server (IIS) > Web Server > Common HTTP Features.

  5. Make sure the following are selected (checked):

    • HTTP Errors

    • Static Content

  6. Select Health and Diagnostics and make sure the following is selected (checked):

    • HTTP Logging

  7. Select Performance and make sure the following is selected (checked):

    • Static Content Compression

  8. Select Application Development and make sure the following are selected (checked):

    • .NET Extensibility 4.8 (or higher)

    • ASP.NET 4.8 (or higher)

  9. Select Next to go to Features and make sure the following are selected (checked):

    • .NET Framework 4.8 (or higher)

    • ASP.NET 4.8 (or higher)

  10. If needed, select the Install button to install features as needed. When the installation is complete, close Server Manager.

The ASP.NET 4.8.1 (or newer) framework has been installed on the web application server.

NOTE: This does not get installed with IIS by default. It must be installed separately.

The SSL certificate is installed on the web application server.

NOTE: The SSL certificate should have the same URL as the URL defined in the DNS.

The installation files are downloaded to your web application server.

NOTE: These will be sent to you prior to the installation.

You should have one file for each of the following:

  • Database migrator

  • Service

  • Web application


Authentication and Credentials

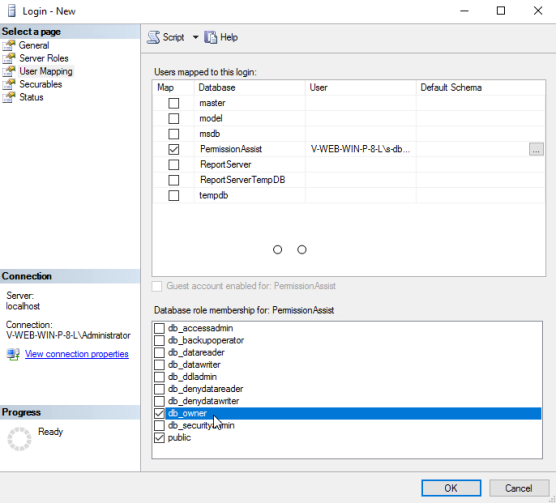
An account that Permission Assist can use to read and write to the Permission Assist database has been created.

NOTES:

  • The account can be set up as either a service account (using integrated authentication) or a SQL account (using SQL authentication).

  • We will make sure the account has the proper permissions during the installation.

The Active Directory service account has been created (this is the account Permission Assist will use to connect to Active Directory). It can be the same account as the service account used to access the database if needed based on your internal practices.

The Active Directory service account has the following permissions:

  • Read all user information

    NOTE: Most accounts will automatically be given this permission when the account is set up.

If you are planning to use the provisioning feature in Permission Assist, confirm the service account also has the following:
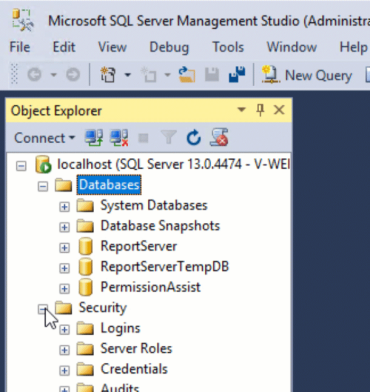
  • Create, delete, and manage user accounts

  • Reset user passwords and force password change at next login

  • Modify the membership of a group


Database Server

MS SQL Server is installed on the database server.
SQL Server Management Studio is installed on the database server and you can log in using the account created under "Authentication and Credentials".

A "PermissionAssist" database is created (optional).

  1. In SQL Server Management Studio, create a new database (see picture below). The New Database window appears.

  2. In the Database Name field, enter the name of your database (for example: PermissionAssist).

  3. Select OK to save the changes and close the window.

  4. Expand the Security folder (see picture below).

  5. Expand the Logins folder.

  6. Right-click on the account that Permission Assist will use to connect to the Permission Assist database, and select Properties.

    Tip: This account is either the service account or SQL authenticated account mentioned in the pre-installation checklist.

  7. Select User Mapping.

  8. Select the Permission Assist database.

  9. In the "Database role membership for: YourPermissionAssistDatabaseName" area, select db_owner and verify that Public is also selected (see picture below).

  10. Select OK to save the changes and close the window.

  11. Close SQL Server Management Studio.


DNS

The DNS for the Permission Assist website is created.
The URL matches the URL in the SSL certificate.


SMTP

The service account that Permission Assist can use to access SMTP for sending email alerts and notifications is created.
You have the username and password that are required to access the SMTP server (if your environment requires it).